How to Edit the .htaccess File
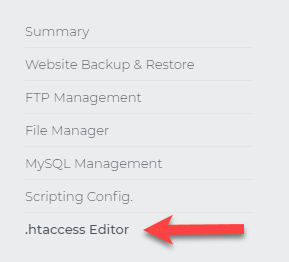
To access the .htaccess Editor, log in to your Hosting Dashboard.

In the left sidebar, click on .htaccess Editor.
.htaccess Editor
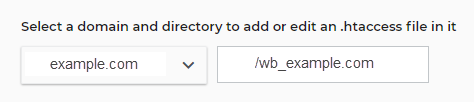
The .htaccess editor is a powerful tool with which advanced users can customize their websites. We have redesigned the interface to make it more user-friendly. When using this tool, your first step will always be to select the domain and directory where you are applying the changes.
Features of the .htaccess editor:
Direct Editor
Advanced users may need to edit their .htaccess files directly. Select the domain from the dropdown and then a directory, and then click on Use Direct Editor.

Note: This is only recommended for advanced users. An error could result in your website(s) being disabled.
| 1) Hotlink Protection: Prevent unauthorized URLs from loading files within specified directories at your site. You can choose to redirect these requests and specify URLs that are allowed to access your site files. 2) Password Protection: Password-protected directories with user access lists. 3) Custom Error Pages: Substitute pages that you designate for standard server error message pages. Custom error pages are useful when you want error pages to match the overall design of your site. 4) Block IP Addresses: Block users from specific IP addresses or a range of IP addresses from accessing your site. 5) Default Pages: Change the home page for a directory from the standard default filenames to the file that you specify. You can also set a prioritized list of default pages. 6) MIME Types: Add or override system MIME types. 7) URL Redirect: Redirect requests for a specific file or directory to a new destination. Redirecting prevents existing links at other sites or in bookmarks from generating 404 - File not found errors. 8) Open Directory Browsing: Allows you to control access to the directories of your website. With this tool, you can choose to display the contents of a directory if no default page is specified. |
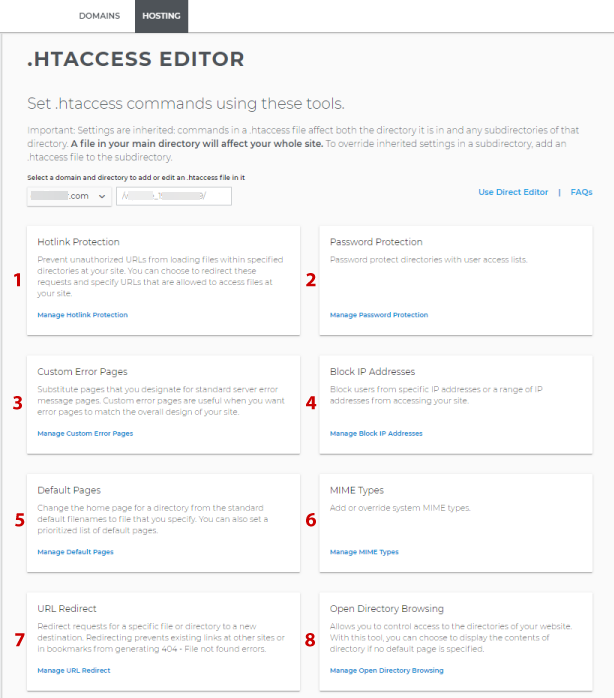 |
Important note: Settings are inherited commands in a .htaccess file that affect both the directory it is in and any subdirectories of that directory. A file in your home directory will affect your whole site. To override inherited settings in a subdirectory, add a .htaccess file to the subdirectory.
Hotlink Protection
Bandwidth theft (also called hotlinking and leeching) is the direct linking to a website's content, typically images or video. People often use an image tag to display an image from someone else's web page on another site, eBay auction listing, blog, or forum message post. When people request hot-linked images and other files from your site, your plan bandwidth is used, giving this practice the name of bandwidth theft.
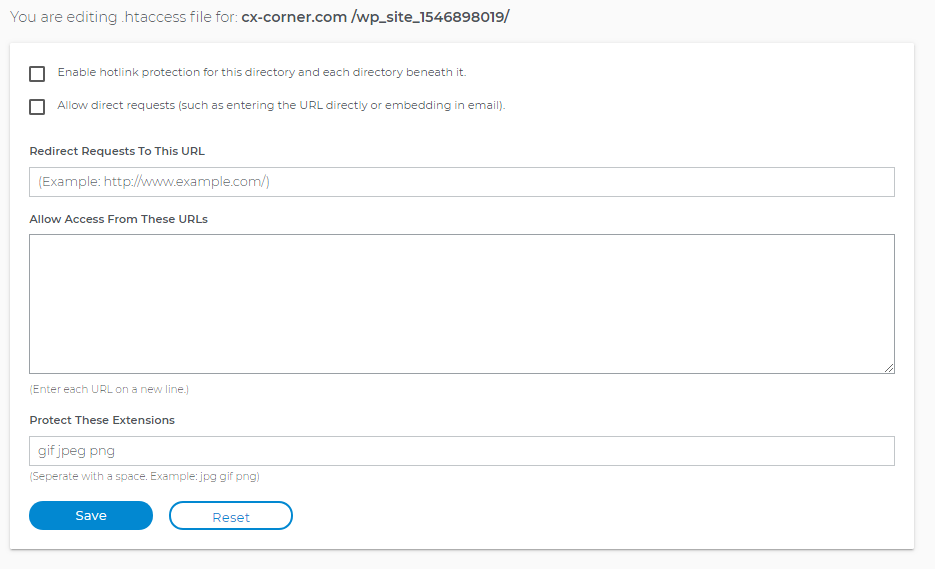
| 1) Log in to your account, Hosting Summary. 2) In the left pane, click on .htaccess Editor. 3) Click Manage Hotlink Protection. 4) The directory you are protecting is shown at the top. 5) Check the Enable hotlink protection box. 6) To permit requests for the files directly from URLs or links in email messages, click the Allow direct requests checkbox. |
7) If you want the requests to be redirected, enter the URL to which requests should be redirected. 8) To specify URLs that are allowed to access files from your site, enter each one on its own line in the designated field. The system automatically adds the main URLs for your plan. 9) Enter the extensions to protect from hotlinking, separated by a space. Click Save to save your settings. Optionally, click Reset to return to the previous settings. |
 |
|
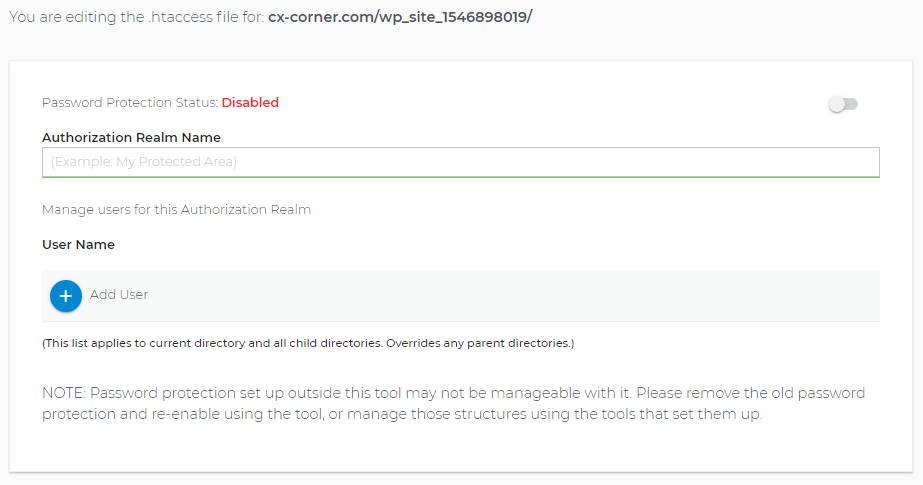
Password Protection
Protecting a directory involves two steps: enabling protection and designating the users authorized to access the protected directory. The Password Protection tool allows you to password encrypt certain directories on your website. You can allow individual users access to these encrypted pages by giving them their own username and password.
Note: Password protection applies to the directory level and cannot be used to protect individual files. If you wish to protect only one file, place that file in its own directory.
| 1) Log in to your account, Hosting Summary. 2) In the left pane, click on .htaccess Editor. 3) Click Manage Password Protection. 4) The directory you are password protecting is shown at the top. |
5) Check the Enable Status switch to green or right. 6) Add a name for this realm, a tag name for this directory. 7) Add Users with Passwords and Save. 8) This list applies to the current directory and all child directories. |
 |
|
Password protection set up outside of this tool may not be manageable with the tool. Please remove the old password protection and re-enable using the tool or manage prior passwords using the tool that set them up.
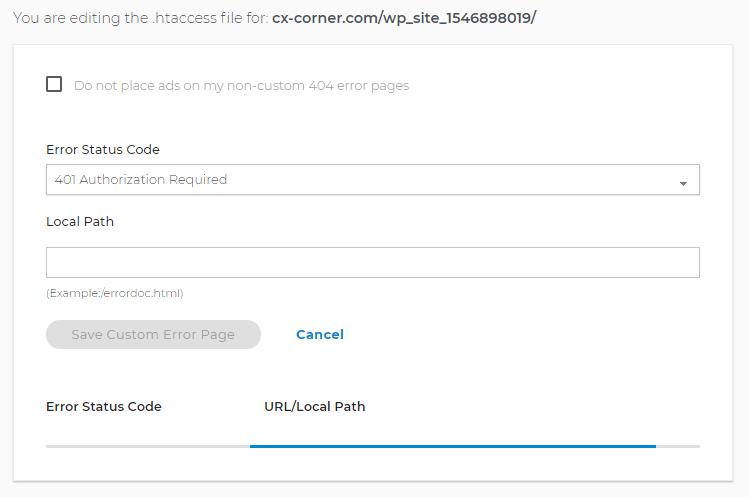
Custom Error Pages
You can substitute pages that you designate for the standard server error pages that display when the Web server returns unsuccessful response/status codes. Custom error pages are set in a .htaccess. file. They are useful when you want error pages to match the overall design of your site.
| 1) Log in to your account, Hosting Summary. 2) In the left pane, click on .htaccess Editor. 3) Click Manage Custom Error Pages. 4) The directory you are password protecting is shown at the top. |
5) Select the Error Status Code from the dropdown arrow. 6) Add the path to your custom error page. 7) Click on Save Custom Error Page. 8) A visitor will see your custom error page that corresponds with the assigned error code. |
 |
|
Block IP Addresses
Block users from specific IP addresses or a range of IP addresses from accessing your site.
| 1) Log in to your account, Hosting Summary. 2) In the left pane, click on .htaccess Editor. 3) Click Manage Block IP Addresses. |
4) The directory you are password protecting is shown at the top. 5) Click the blue Add IP Address/Range icon. 6) Add the addresses you wish to block. |
 |
|
Note: Blocking an IP Address in range would need this kind of format e.g. 222.22.22.01/30, which means blocking the range of IP Addresses from 222.22.22.01 ... 222.22.22.30. You can use this website under the IPv4 to check the range of the IP Addresses (https://www.calculator.net/ip-subnet-calculator.html)
Default Pages
Change the home page for a directory from the standard default filenames to a file that you specify. You can also set a prioritized list of default pages. If the first filename listed does not exist, the server will look for the next one, and so on. Click the Add New FileName to create your list of default page filenames. Drag them to the desired order.
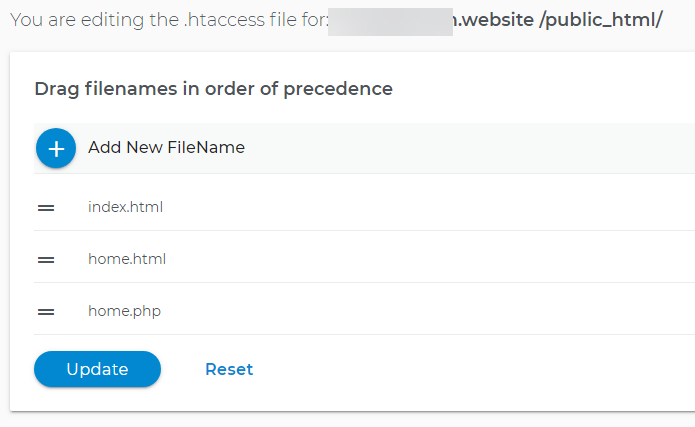
Note: If you leave the Default Index Settings box empty, the standard default filenames will be used.
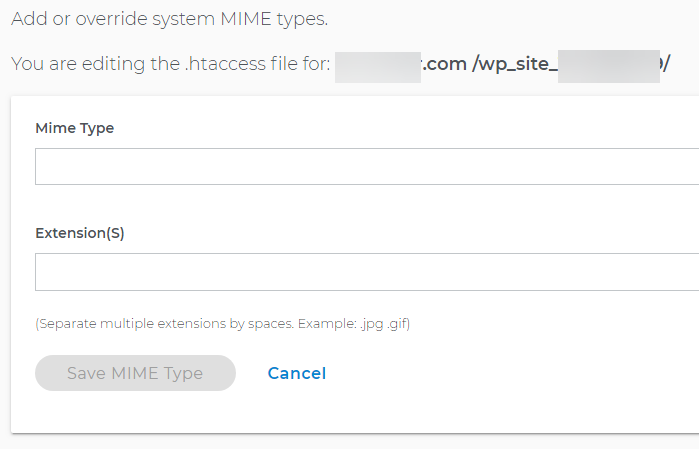
MIME Types
MIME types tell browsers how to handle files. Most MIME types are set globally on our Web servers.
1) Click Add New MIME type.2) Enter the MIME type.
3) Enter the file Extension.
4) Click on Save MIME Type.
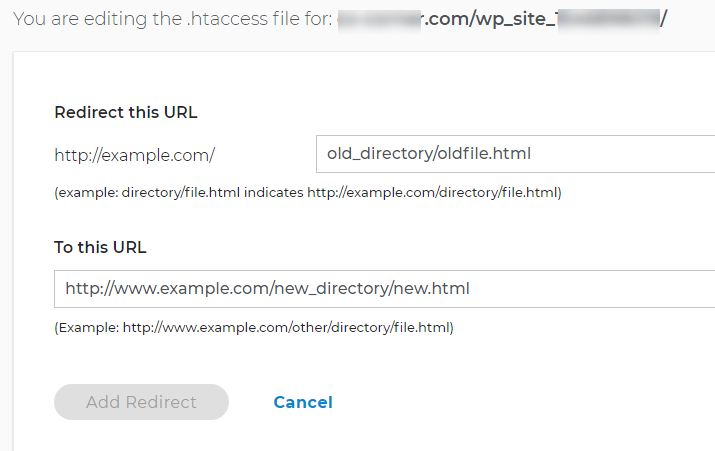
URL Redirects
Redirect requests for a specific file or directory to a new destination. If you change your site structure and rename files or directories, redirecting prevents existing links at other sites or in bookmarks from generating 404 - File not found errors. Visitors will be redirected to new or renamed files.
1) Click Add URL Redirect.2) Follow the example settings that are provided.
3) Click on Save MIME Type.
Open Directory Browsing
Allows you to control access to the directories of your website. With this tool, you can choose to display the contents of the directory if no default page is specified.
1) Click Manage Open Directory Browsing.2) Check the Enable Directory Browsing box.
Top of page